rAV1ator CLI
rAV1ator CLI, or just rav1ator-cli, is a TUI tool that provides an interactive command line interface for encoding videos with Av1an using various different encoders including rav1e, aomenc (specifically aom-av1-lavish, as mentioned in the aomenc page), SVT-AV1, x265, and x264.
rAV1ator CLI was maintained by Gianni Rosato at https://github.com/gianni-rosato/rav1ator-cli, but is now maintained by Ultimaxx at https://github.com/ultimaxx/rav1ator-cli as of January 2025. The original repository has since been archived.
~ > rav1ator-cli -h
rAV1ator: CLI Edition_ v0.2.4

Usage:
	rav1ator-cli [input] [output] [--offline]

Dependencies (Arch):
	rust ffmpeg python mkvtoolnix-cli vapoursynth gum numactl vapoursynth-plugin-bestsource-git av1an ffms2

Options: (Currently, only one option is useful at a time)
	-h, --help			Print this help section
	-l, --last-used		Print last used encode settings from history
	-f, --full-history	Print full history from ".rav1ator-cli-history" file
	-b, --binaries		Just install binaries, then exit
	-x, --offline		Don't check for updates.
	-a, --batch			Batch encode. All video files in a directory specified after this flag are encoded.
rAV1ator CLI can:
-
Check if it is installed & up to date on its own without a package manager
-
Download AVX2-optimized encoder binaries compiled with -O3 -flto in most cases & allow the user to install them with detailed instructions
-
Remember encoding history and let you view your whole history or your most recent command
-
Allow you to encode an entire directory of video files with the same settings
-
Encode with x264, x265, aomenc, SVT-AV1, or rav1e, set a speed preset, CRF/quality value, FFmpeg parameters, and encoder parameters
-
Generate Av1an encoding commands with the user's chosen settings & run them to encode a provided input video to an MKV output.
-
Encode from scratch, or resume a previous rAV1ator CLI encode
-
Engage with rich interactivity features like spinners, prompts, & dropdowns
-
Automatically error check binaries with SHA256 hashes for security & convenience
Overall, it aims to provide an easy way to encode videos on the command line with helpful visual feedback. The interactive prompts help users pick encoding settings without needing deep encoding knowledge.
Installation
rAV1ator CLI is natively supported on Linux, & is supported on Windows via WSL2. A tutorial for setting up WSL2 is provided below. macOS is not supported.
Linux (Arch)
These instructions are for Arch Linux specifically. Other distros should be very similar, and packages that are Arch-specific will be labelled. If you're on Ubuntu, you should see the relevant section of the AV1 for Dummies blog post on this site.
If you're on another distro and you want to be able to follow these instructions specifically, see the Linux (Other) section.
- Update your system before doing anything. On Arch:
sudo pacman -Syu
- Install
yay(Arch only) by running the following commands:
sudo pacman -S --needed base-devel git
git clone https://aur.archlinux.org/yay.git
cd yay && makepkg -si
- Next, you'll want to install all of rav1ator-cli's dependencies. You can do that by running:
yay -Syu openssl ffmpeg python mkvtoolnix-cli vapoursynth gum numactl vapoursynth-plugin-bestsource-git av1an ffms2
- Install rav1ator-cli:
curl -sOJ https://raw.githubusercontent.com/ultimaxx/rav1ator-cli/main/rav1ator-cli && chmod +x rav1ator-cli
sudo cp rav1ator-cli /usr/local/bin
You're done! Run rav1ator-cli -h to get some help getting started. Happy encoding!
Linux (Other)
If you're on Ubuntu, you can see the relevant section of the AV1 for Dummies blog post on this site for more information about doing this without a distrobox. However, a distrobox is valuable because you can use Arch's fast-paced package management on other distros. Distroboxes are generally easier than Docker for beginners, and use Docker or Podman behind the scenes anyway. This tutorial will focus on using Distrobox with Podman.
-
Install Distrobox and Podman on your distro of choice. Please look up how to do this for your respective distro, and how to get everything set up properly.
-
If you already use Podman, are re-creating a Distrobox, or you already have other Distroboxes running from long enough ago where your Arch image is outdated, you might want to run
podman image rm docker.io/archlinux/archlinux:latest. It won't hurt to run it anyway if you're not sure. Do this every time you make a new Distrobox if you're experiencing issues with Distrobox creation. -
Now, run
distrobox-create --name rvcli-box --image archlinux:latest. You do not need to name yours "rvcli-box", but that's what we're going to call the box in this tutorial. -
distrobox enter rvcli-boxto go inside. You are now using Arch Linux from within your existing distro! -
First, run
sudo pacman -Syuto update your system. -
Next, run
sudo pacman -S --needed base-devel git && git clone https://aur.archlinux.org/yay.git && cd yay && makepkg -si. -
Finally,
yay -Syu openssl ffmpeg python mkvtoolnix-cli vapoursynth gum numactl l-smash vapoursynth-plugin-lsmashsource av1an ffms2to install the necessary dependencies. -
Download rav1ator-cli:
curl -sOJ https://raw.githubusercontent.com/ultimaxx/rav1ator-cli/main/rav1ator-cli && chmod +x rav1ator-cli -
Copy rav1ator-cli to your /usr/local/bin:
sudo cp rav1ator-cli /usr/local/bin -
If you'd like to exit the distrobox, just do
Ctrl+D.
You're done! Run rav1ator-cli -h to get some help getting started. Happy encoding!
Windows
The content in this entry was written by pat-e, or pate on Discord. This tutorial focuses on Windows 11.
Enable WSL2 on Windows 11 and Install "ArchWSL2" by pat-e
Basic installtion
-
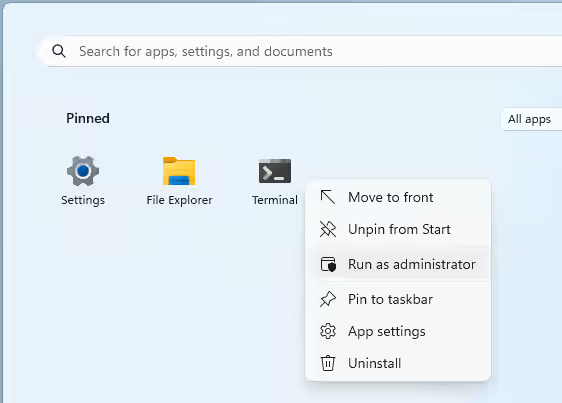
Open the Terminal as Administrator:
-
In the Command-Prompt, enter the following to install WSL:
wsl.exe --install --no-distribution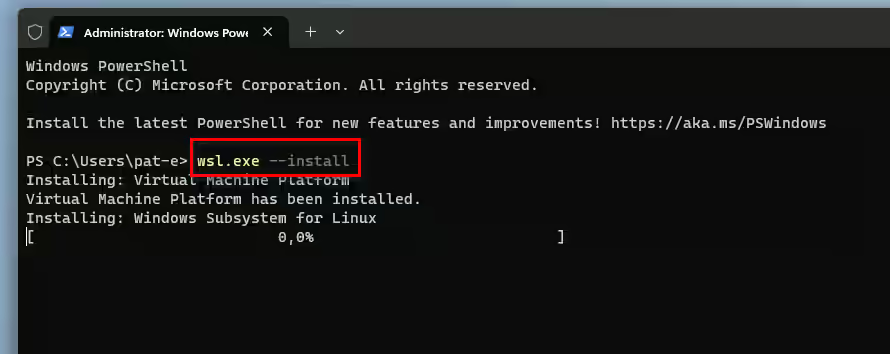
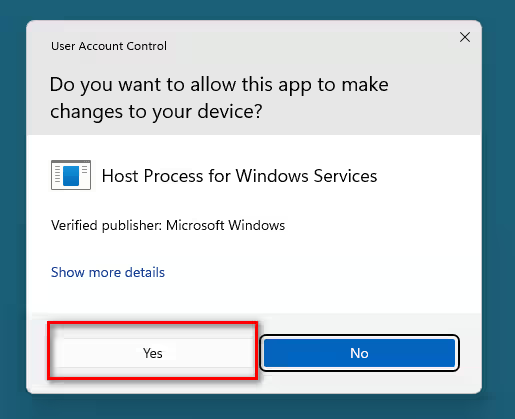
If the "Host Process for Windows Services" asks for allowing changes, approve it (Press "Yes"):
-
Once the installation of WSL is finished, restart your Computer:
shutdown -r -f -t 1
-
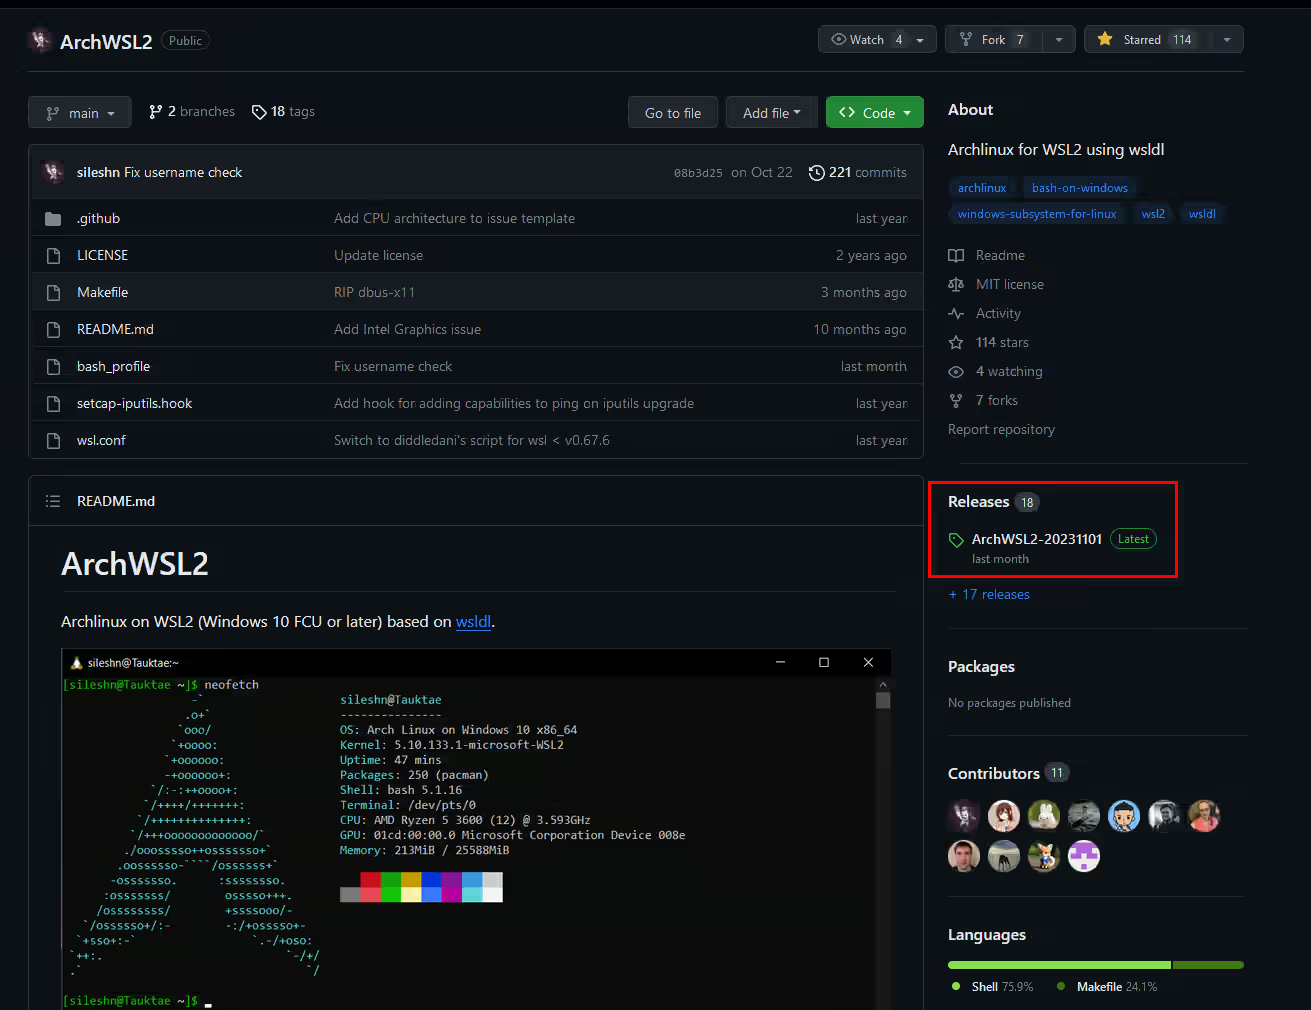
From This GitHub link, download the latest release of ArchWSL2 in the Releases section:
-
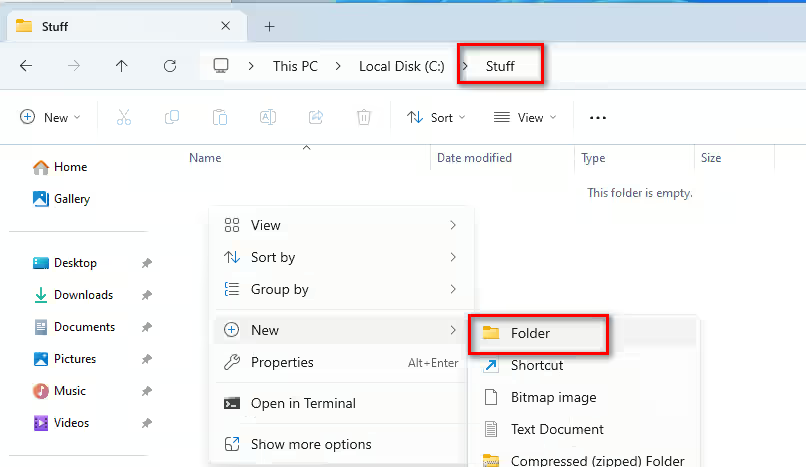
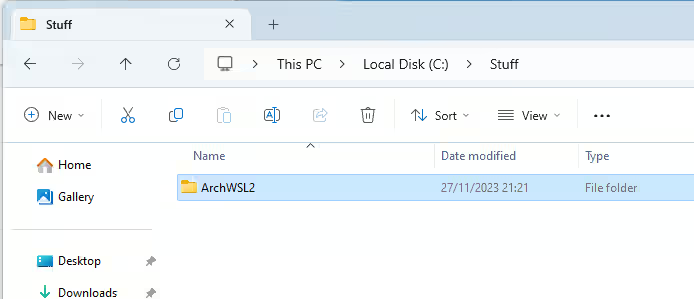
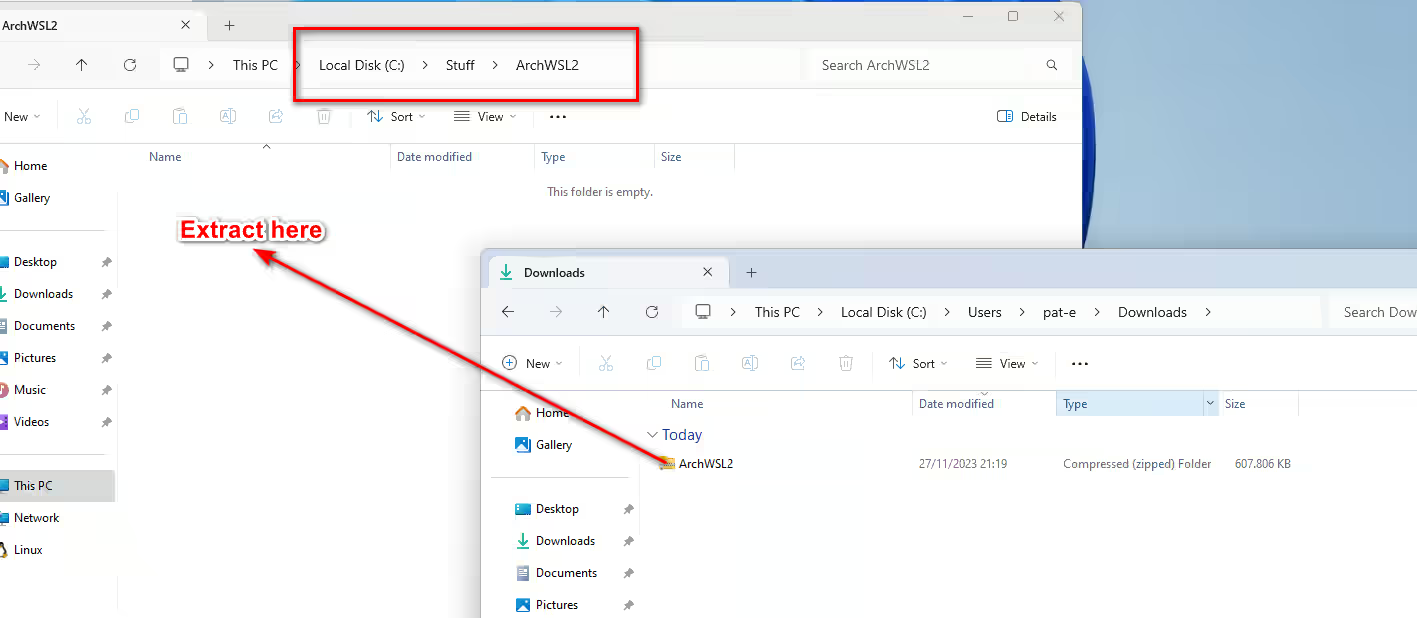
On your SSD, create a folder where we will place the ArchWSL2 files. This folder must be kept and never deleted as this will contain the base files for this distribution. It is advised to use an SSD instead of an HDD. The storage must be local storage, not a network-share or a removable disk. In our example, we will create a folder located at C:\Stuff\ArchWSL2;
-
Extract the downloaded ZIP of "ArchWSL2" into your newly created folder:
-
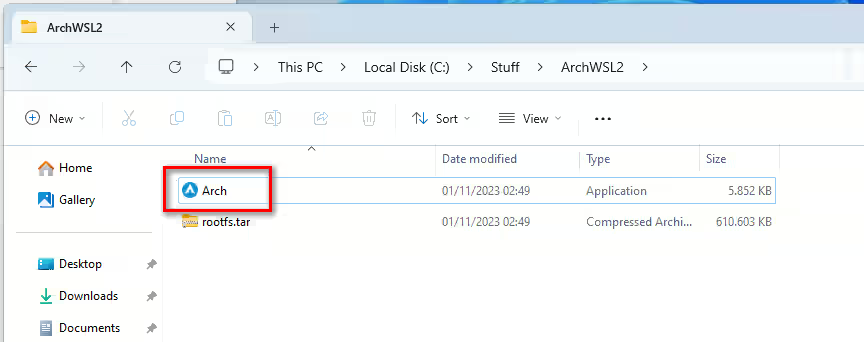
Once extracted, start the extracted "Arch.exe":
-
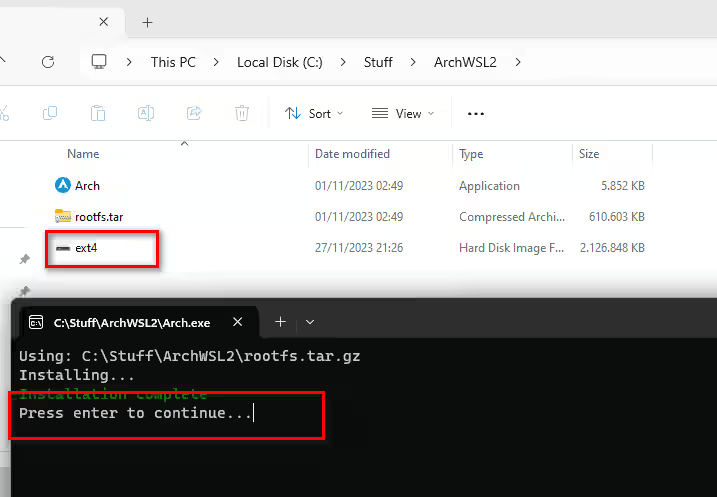
On first start, the program will create a virtual disk (VHDx). Once finished, press "Enter" to continue (it will close the window)
-
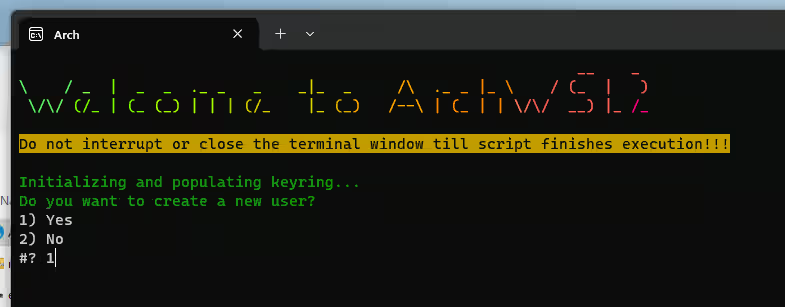
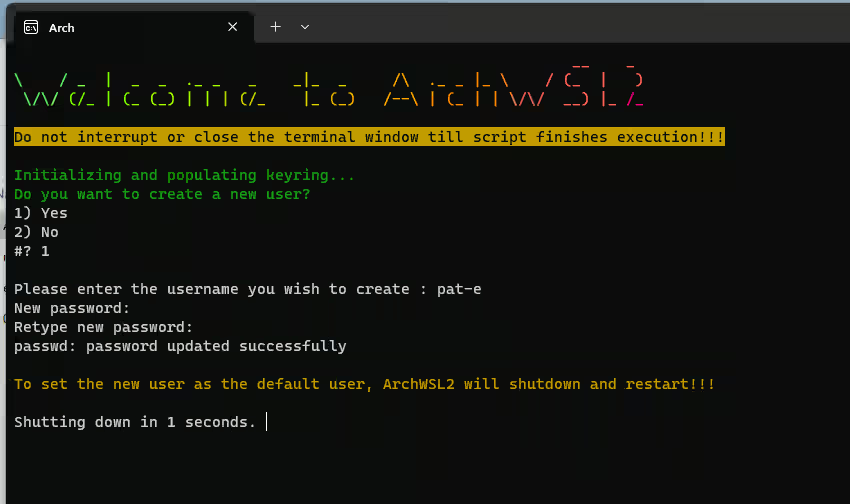
Once the virtual hard disk is created, restart the "arch.exe" again. It will finish some steps and ask for creating a new user-account. This account is completely separate from your Windows user. Please remember the username and password you use.
-
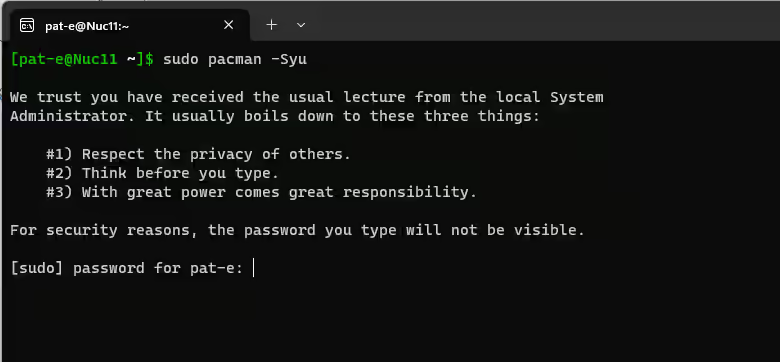
The Window will close and reopen again. As first step, update all packages. As your account you created earlier is in the sudo-group, you have to enter your password again as confirmation.
sudo pacman -Syu
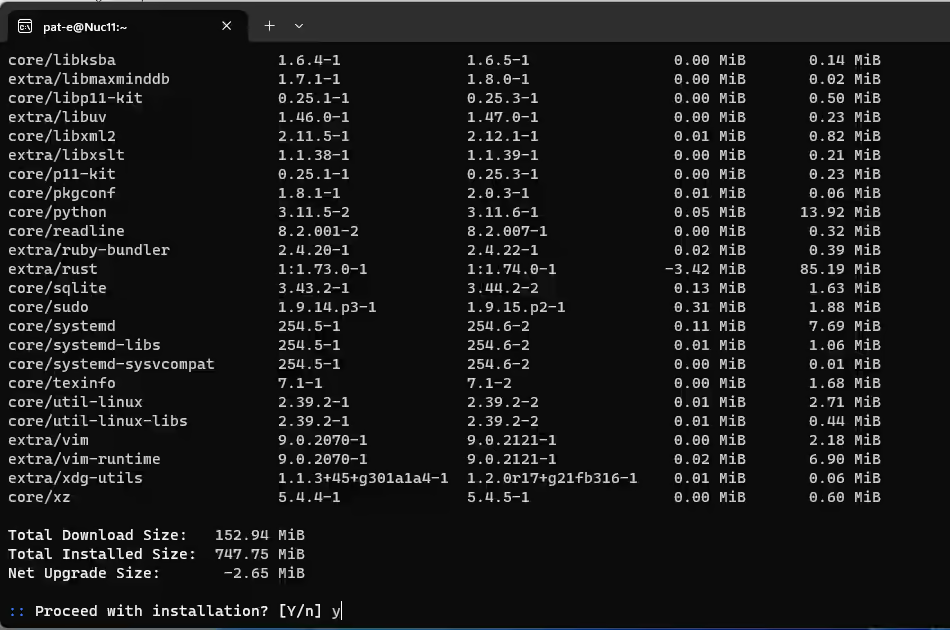
- Approve the installation of all the updates (Type "y"):
- Done... You can now use ArchWSL2.
After the Installation and Cleanup, How Do I Start Arch?
For the start of Arch, there are 2 steps possible:
-
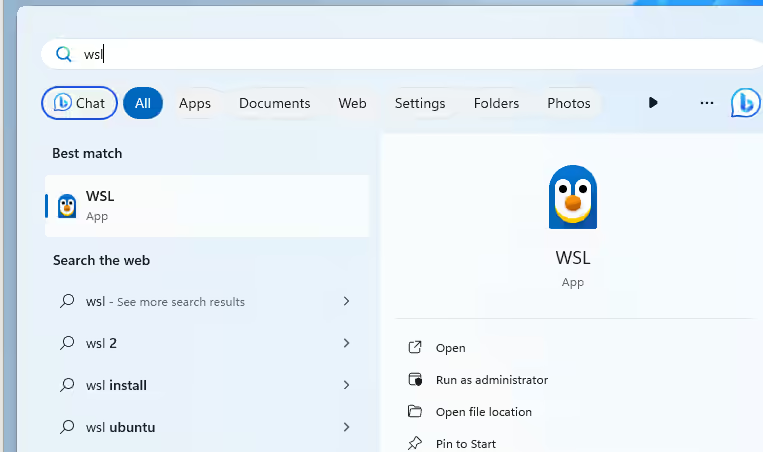
You can just start "wsl" form the command prompt, terminal or "Windows Search":
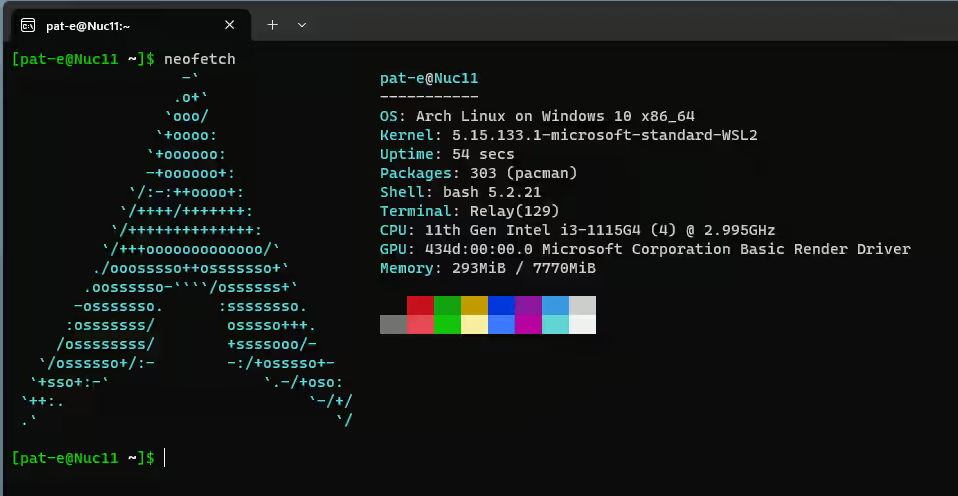
-
As another option, you can create a Shortcut to the "arch.exe" in the Installation-Folder:
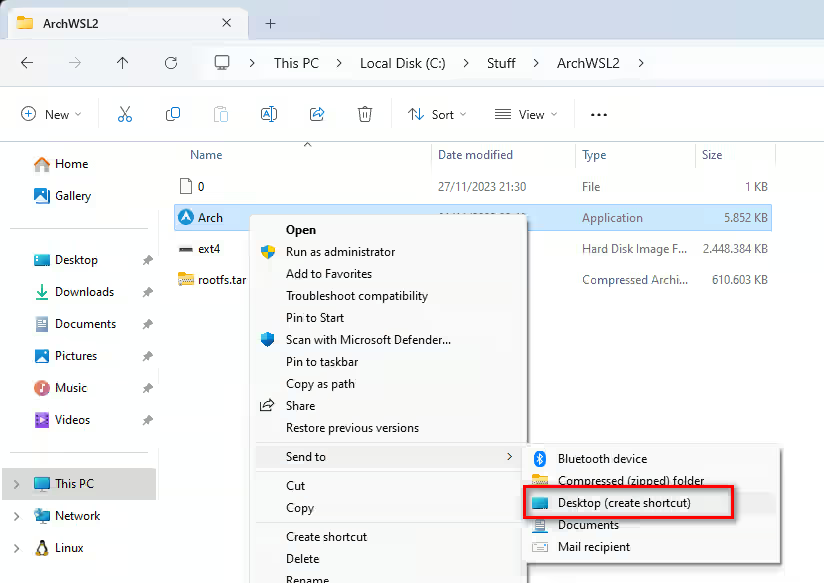
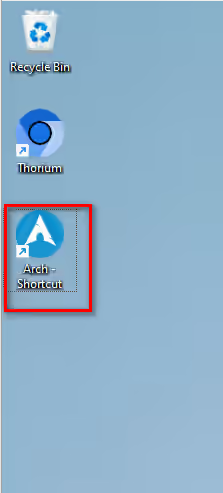
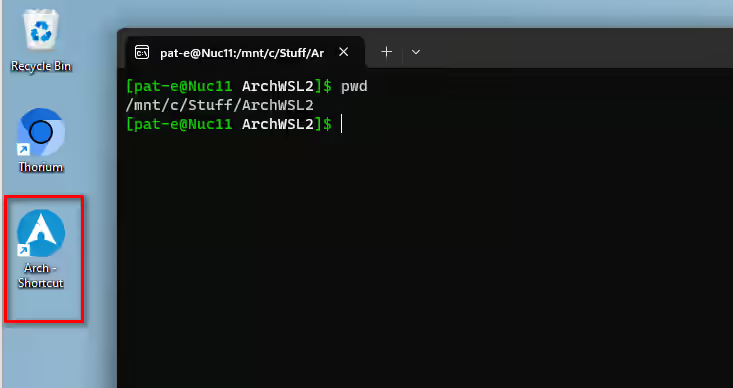
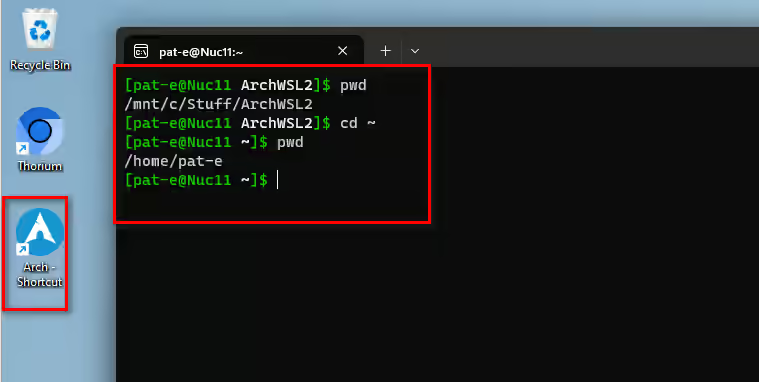
Hint: When you open the "arch.exe", you will be placed into the directory where also the "arch.exe" is located. To change to your home directory, just enter the command below:
cd ~
Unlock WSL RAM Usage (Optional)
Hint: WSL caps RAM usage at 50% of the total RAM available on your system.
When you start the VM, you will see that you only will only have 50% of your total memory available:
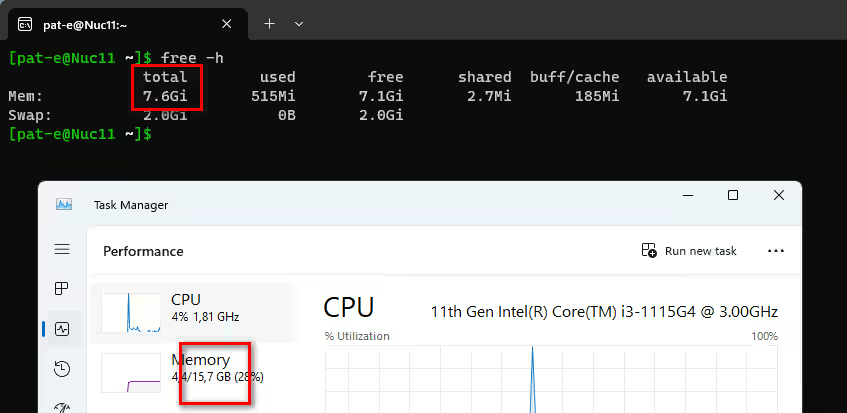
To allow more memory, you need to place a config-file in your profile-folder in Windows. See the instructions below:
-
Open "notepad.exe" and enter the following:
[wsl2]
memory=12GB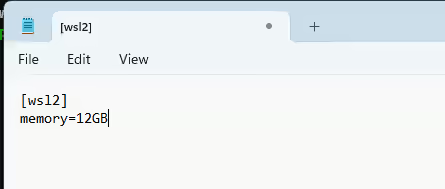
-
The amount of memory should never be more than current memory. Set it to total memory minus 4GB to leave enough left over for Windows. In my example, Windows has 16GB of RAM available, so I select the memory to be 12GB.
-
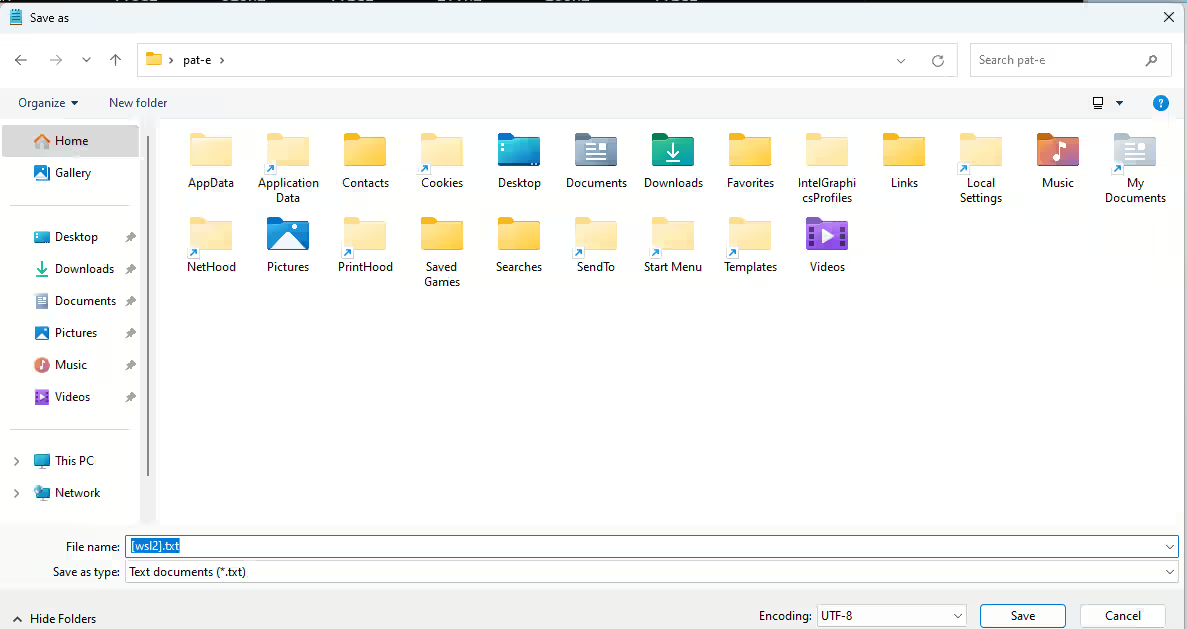
When saving the file, enter the following as filename:
%userprofile%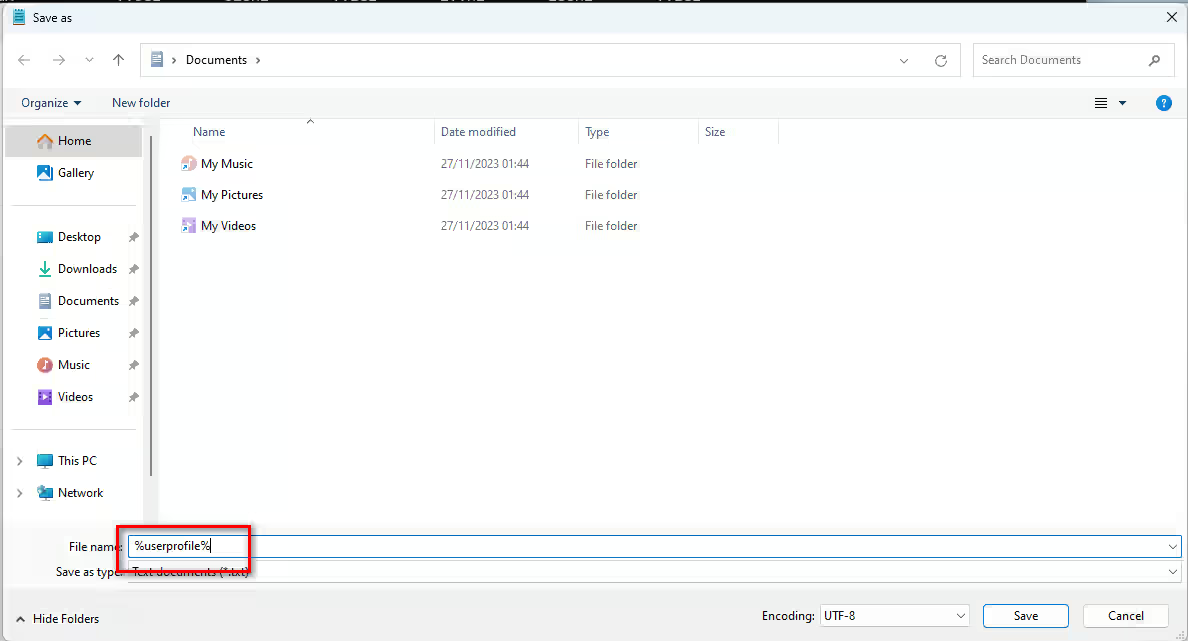
-
When pressing enter, the directory will switch to your user-profile folder:
-
Select the "Save as type" to "All files (*.*)" and save as the following filename:
.wslconfig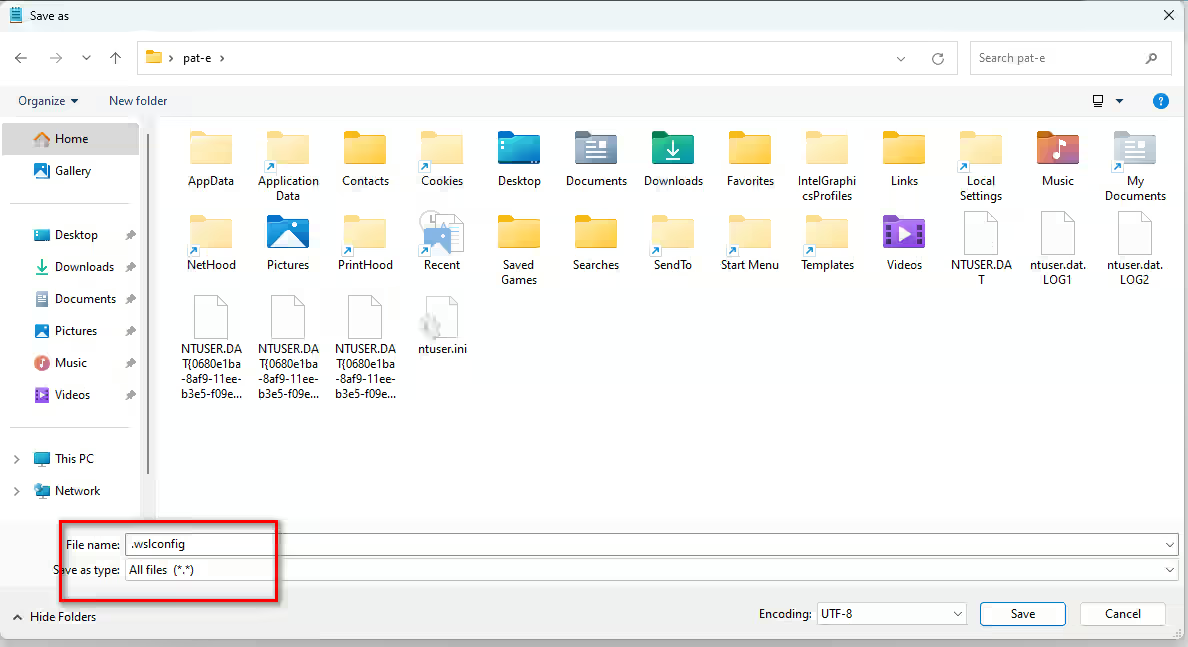
Make sure the file is saved as
.wslconfig. Then exit notepad. -
Exit any current running WSL / Arch (exit):

-
Open the Terminal as Administrator and "shutdown" any running WSL:
wsl --shutdown
-
Restart WSL again and check the memory settings from within Arch by running the following command:
free -h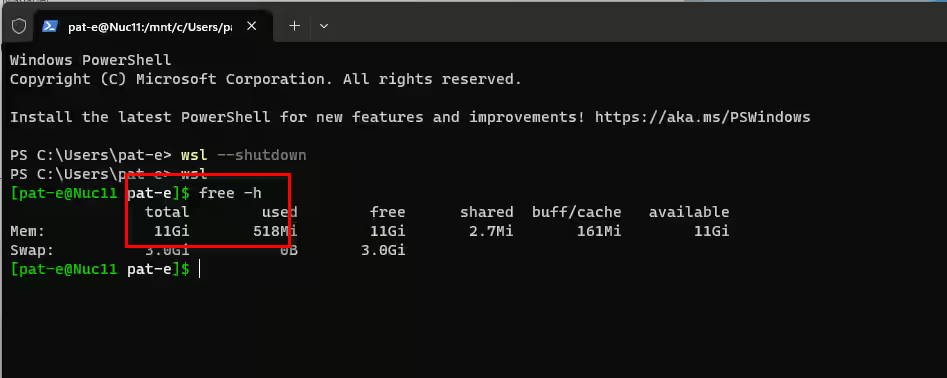
If you've made it this far, you should be more than ready to encode. We hope you enjoy rAV1ator CLI!
macOS
No macOS support is provided at this time. It is definitely technically feasible, and I may produce a separate tool in the future with proper macOS binaries, though this would be a burden to keep up considering I don't currently see any demand for a port.
Troubleshooting
- If your encode features a grey screen flashing occaisonally in the output, create a lossless intermediary of your source with x264
-qp 0. This happens because of VC-1 decoding errors, and is not something I can fix. - If you have any more questions, please join the AV1 for Dummies Discord server. There is a rAV1ator CLI channel over there, and I am always happy to talk!